How to Build a Sprinter Van Bathroom
Having a bathroom in your van conversion is one of the most hotly debated van life topics! Some vanlifers think they’re a complete waste of precious space whilst others couldn’t live without one. I definitely fall into the second category! In fact, the first thing I did when we bought our van was google Sprinter Van Bathroom. Luckily I was greeted with lots of inspiration and ideas, minor panic over!
Do I need a bathroom in my Sprinter van?
As far as the great van bathroom debate goes I definitely think everyone is different. When planning your van build work out what the essentials are for you, and then develop your layout from there. We have a fixed bathroom in our van with a toilet and shower. There’s a lot of great options we’ve seen though: no bathroom, a hidden toilet, a pee tube, a bucket, outside shower, collapsible shower, or even a mini bath tub! No one option is better than the other. It’s all about your priorities for your space, what works best for you and how you feel about going in the great outdoors! It’s also worth thinking about where you plan to travel, some countries have easy access to public toilets, others not so much.
Our Sprinter van bathroom
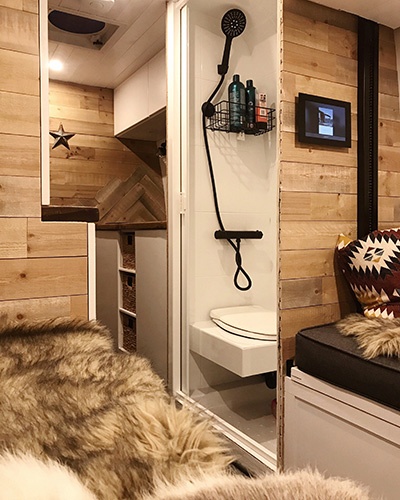
Our bathroom is definitely on the small side. It’s only 76cm wide by 56cm deep. We intended it to be slightly bigger but our bed took up a little more space than anticipated. It’s so small your knees touch the wall when sat on the toilet and Will can only just fit width wise to have a shower but hey, it does the job! Whilst a bathroom was essential for us we wanted it to take up as little space as possible. Lets face it, you’re not going to sit and read a book in there while the other half is having a cuppa a couple of feet away!
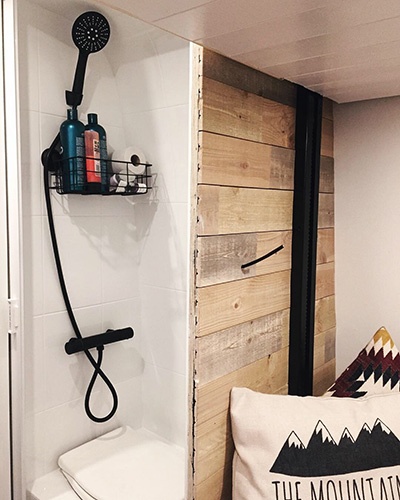
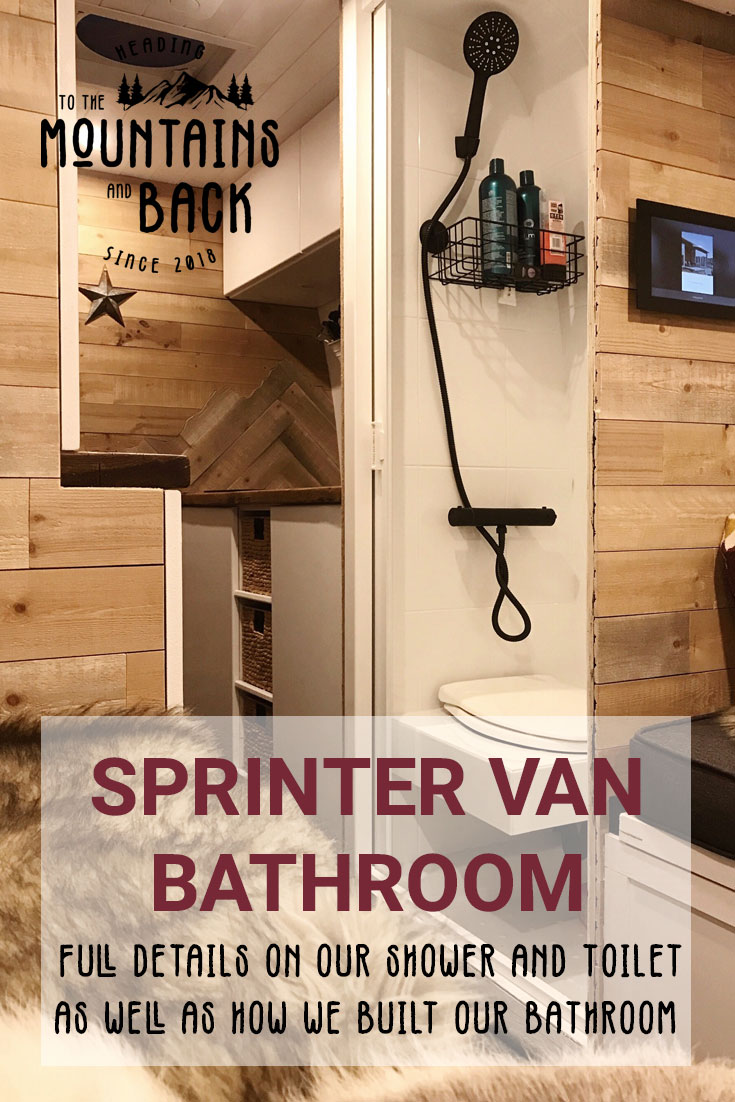
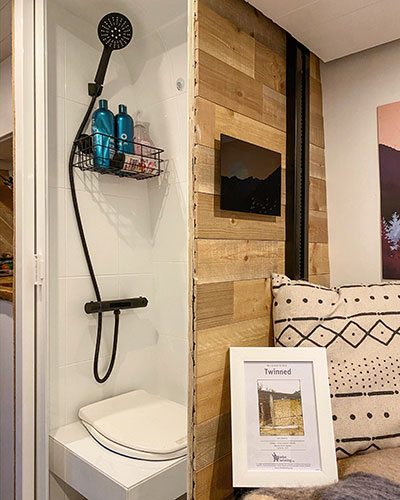
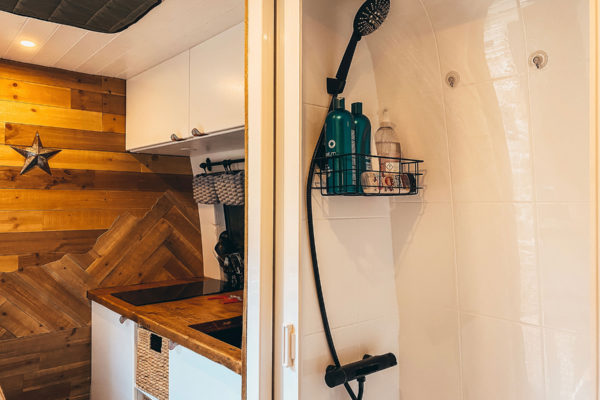
Our van bathroom has a pretty basic design featuring a urine diverting toilet, a shower (hot water sourced from our engine heat), plastic shower panels to keep the water contained, a shower tray and a retractable shower door. We added a basket for shampoo and soap, a toilet roll holder and some hooks for drying towels and clothing. These all attach using suction cups to avoid drilling any holes in the walls where water could seep through.
Construction
This is everything we used to create our bathroom:
- Separett Privy 501
- Reco Wall Panels with Tile Effect
- Black Mixer and Shower
- Universal Shower Tray
- Nautilus Retractable Shower Door
- Plug
- Toilet Roll Holder
- Shower Basket
- Hooks
- Sikaflex 512
- 12v Dimmable LED Spotlight
- 12mm Ply
- Right Angle Bracket
Building the Walls
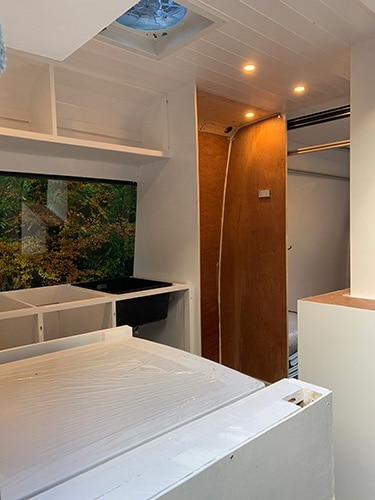
We started our bathroom build by making a shell out of plywood. The bathroom wall nearest the back door doubles as the fixing for our Happijac bed lift so is constructed from 18mm ply for strength. The wall nearest the kitchen is made from 12mm ply. We used a template to cut the ply, allowing it to follow the curve of the van and fastened using right angle brackets to the floor, side wall of the van and ceiling. Make sure they’re on the inside of the bathroom so they’re subsequently hidden by the wall panels and shower tray.
We installed our shower tray next (see below) and then installed the Reco Wall Panels. The side walls were cut to shape using the same template used for the plywood uprights and glued to the ply using Sikaflex 512. We then used a continuous strip of wall panel on the back wall of the bathroom curving it up and over the shape of the van to give us our final wall and bathroom ceiling. Once all the corners and edges are sealed with Sikaflex 512 you have a fully water tight bathroom. We finished off our bathroom by installing a 12v LED Spotlight in the ceiling.
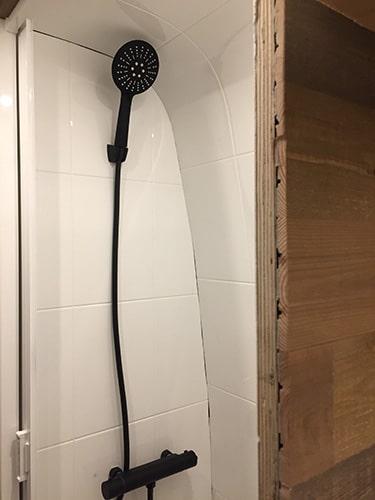
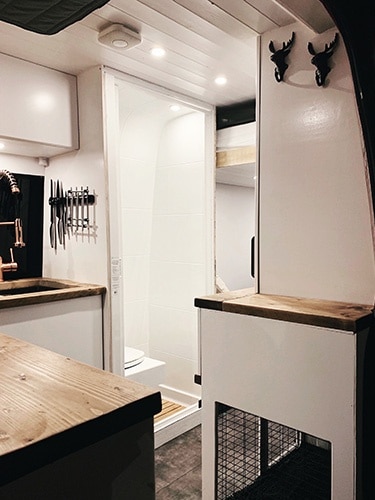
We’re really pleased with the shower wall panels we used. They keep all the moisture contained, away from the wood and shell of the van. The only thing we didn’t think of was the tile pattern and the shape of the van. As you can see from our pictures the tile lines don’t match up between the side and back walls of the bathroom. Due to the curve of the back wall it’s impossible to align them perfectly as they gradually get more out of line as the van curves. I’m slowly learning to live with this though!
Shower Door
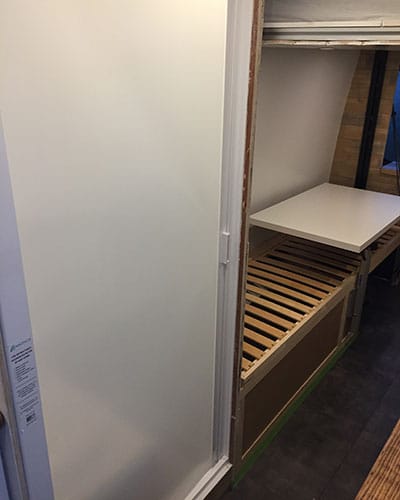
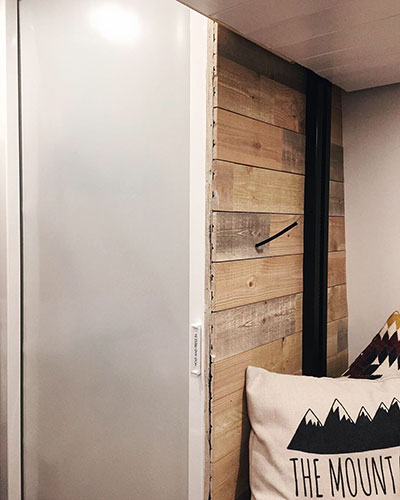
Our door is a retractable Nautilus Shower Door. They’re a great option for camper vans as they roll back into their own frame, taking up very little space. It’s also self-cleaning which is a definite bonus! They’re easy to install but not easy to get in the UK. You either need to cover shipping from USA to UK or have a well timed work trip to America!
The doors are made to order in the size you require and attach to the inside of your shower walls using sticky pads. Both the upright where the door rolls in to and the opposite side it clips in to when shut have a full sticky pad along their length. There’s then a guide rail (you cut to length) at the top and bottom of the door opening that hooks on to a screw at either end to ensure the door stays in place when shut.
Bathroom Floor
The floor of our sprinter van bathroom is simply a shower tray. We bought a universal shower tray that we could cut to size so it fits perfectly. Firstly we drilled through the floor where our plug would drain in to our grey water tank positioned under our van via a waterless trap. We then cut the shower tray to size and secured to the floor using Sikaflex 512.
Shower
We have a black shower and mixer bar fed directly from our hot and cold water tanks. Our 16 litre hot water tank is heated using the coolant line from our engine. This gives us a full tank of (very) hot water after around 15 minutes driving. You can find out more about our hot water system here.
Our cold water tank is situated under one of our benches (so it doesn’t freeze in winter), with pipes leading to our kitchen tap underneath the shower tray. The pipes for the shower spur off under the sink and come up through the bathroom wall just under the height of our worktop and in to the back of the shower mixer bar. We have a Shurflo Revolution Water Pump that comes on automatically when either the tap or shower call for water.
Toilet
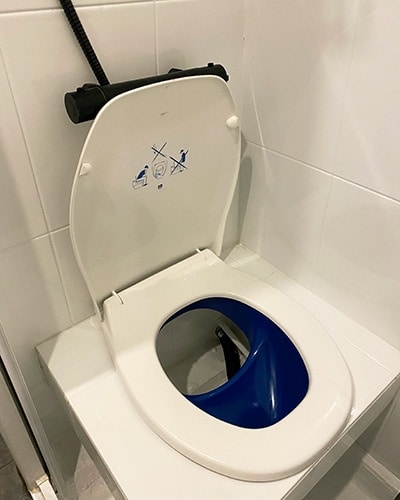
We use a Separatt Urine Diverting Toilet, which is essentially a wee tube with a toilet seat! There’s also a big hole in the back you can use for a composting toilet or in our case for positioning emergency poo bags! Yep, it’s time for that popular van life topic, how do we poop in the van?! On the whole we try not too. Neither of us wanted to deal with cleaning out a toilet which is why we went for this option. Also, it’s a small space and it would be nice to preserve a little bit of romance in the relationship!
We use public toilets where possible, although in some places they’re hard to find or just plain nasty so we also carry biodegradable human poo bags in case of emergencies! Sometimes when you gotta go, you gotta go! I’ll admit I was pretty disgusted by this idea initially but actually it’s pretty painless. Simply attach them under the toilet seat, tie a knot at the top when you’re done and then bin it (make sure you’re parked near a suitable bin!).
Toilet Build
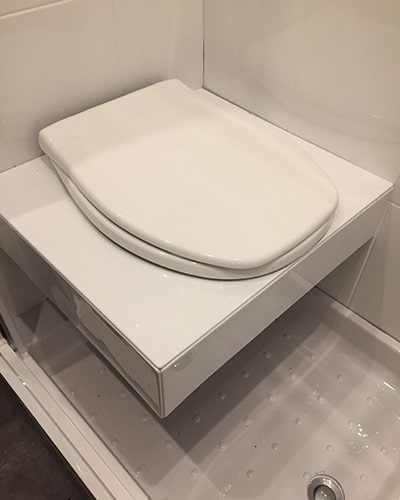
Our toilet sits on a floating platform made from a combination of wood and plastic wall panels. This gives us more room when showering as we can stand with our feet underneath the toilet when facing towards the shower. We made a simple wooden frame out of 3×2″ timber. This is bolted through the bathroom wall to the inside of the kitchen cupboard behind it. This frame is sized to the length of the toilet seat and the depth of the toilet bowl. On top of the frame we attached 12mm ply with a cut out for the toilet to slot in. We then covered the wooden platform with the same plastic as the wall panels, secured the toilet and sealed all edges with Sikaflex.
The wee tube runs through the bathroom wall below the toilet platform, through the van floor and joins the plumbing back to the grey water tank beneath the van. We simply spray natural anti bac down the toilet after each use and we’ve never had an issue with smells.
We have discussed toilet options since living in the van and occasionally discuss putting a composting toilet in. On balance though we’re happy with our current set up. It’s easy to clean, easy to install and wasn’t expensive.
Looking for one final tip? For the ultimate in Sprinter van bathroom luxury grab a noodle bath mat! The floor in our van gets so dirty with Piglet running around all the time so it’s really nice to step out of the shower onto a bath mat. It’s only small and we roll it away when not in use but we definitely appreciate it, especially in winter!
Toilet Twinning
I can’t imagine not having a toilet of some description in our camper van. Don’t get me wrong, there’s still times I wish we were somewhere with a nice luxurious bathroom with running water and a toilet that flushes, but on the whole I’m pretty happy with our little Sprinter van bathroom. At the end of 2019 we decided to twin our van toilet. Did you know that 2 billion people worldwide don’t have access a toilet? When I read this fact I felt incredibly lucky to have a toilet in our van. Even more so when I read that women and girls spend 97 billion hours per year looking for somewhere safe to go. It’s hard to get your head around.
We heard about a charity called Toilet Twinning (we’re not affiliated with them in any way, we just think it’s a great idea). We decided to twin our van toilet so that there was one more toilet in the world! It’s in Uganda to be precise. And yes, we’ve already discussed if it would be possible to drive our van (and our toilet) to meet her twin (they give you coordinates for your toilet); it’d definitely be an adventure! If you’d like to donate or learn more about Toilet Twinning you can find their website here.
Got questions about our Sprinter van bathroom? Drop them below or send us message. If you’ve found this post useful and would like to support our content you can do so by clicking our Amazon UK or Amazon US links before your next purchase from Amazon (we’ll earn a small commission but it won’t cost you any more), or by treating us to a virtual coffee!
Like this post? Pin it!





Designing a bathroom has really become so easy with the help of this article. I was planning to renovate my bathroom. I will surely follow all the tips and suggestions that you have provided in this article. I am sure this article will definitely help many other people like me. Thank you.
Thanks Emma, hope it goes well and glad we could help!